Registration (signup) by users or organisations
Registration process, approval and automated workflows.
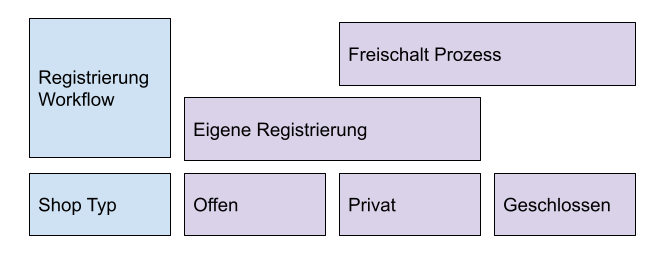
TradelinePro offers two workflows for registering new users or organisations:
- Self-service open registration
- Registration request and approval
The following diagram shows which type of registration process suits which type of shop:
Self-service open registration
Open registration allows new users to create a customer account themselves.
This approach mirrors the typical flow you know from your private online shopping.
In terms of process, any customer can buy in your shop, or you choose other ways to ensure that only commercial customers create a customer account and place an order.
These ways may include, for example:
- Data fields such as company and VAT ID are mandatory fields and are reviewed by a human against the expected information
- A trade licence or commercial register extract must be uploaded during registration
- A note is placed in the footer and T&Cs that sales are made exclusively to commercial customers
- Through downstream processes or in order management (ERP), unwanted (private) buyers are filtered out and routed outside the shop (and notified)
After registering in the TradelinePro B2B webshop, the user receives an email informing them of the successful registration.
Activating open customer registration
To allow customers to register independently online in the shop, click in the configuration on: ???
Registration request and approval
By activating an approval process as part of registering an organisation, you ensure that new registrations must be accepted by your organisation.
A standard registration form is available for your new customers. Submitting the form, however, does not directly lead to an active customer account. Instead, these requests enter a queue and are then handled by customer service.
- In this process step, further information such as a customer or debtor number can be added
- Organisations (customers) can be activated
- Organisations (customers) can be rejected
Users automatically inherit the status of the organisations associated with them. Because a user can only act in B2B mode if they are assigned to at least one active organisation (status = active), it is ensured that a user likewise cannot act without explicit approval by your organisation.
The following status values exist:
| Pending | This status is assigned as soon as registration takes place. A user with status "pending" cannot sign in and therefore cannot perform any actions. |
| Active | You assign the status "active" to grant an organisation full use of the shop. The company admin (typically the user who carried out the registration) receives a confirmation email from the system. |
| Rejected | You assign the status "rejected" to deny an organisation use of the shop. This status prevents the system from allowing another registration attempt with the email address that was used. The company admin (typically the user who carried out the registration) receives a confirmation email from the system. |
As long as an organisation is in the "Pending" status, associated users cannot access the organisation's customer account and see a corresponding notice.
From the perspective of your organisation, the process for reviewing a new organisation looks as follows. Pending registrations appear in shop administration like normal organisations – with the difference that the status is set to "pending". You therefore still have all the options as with an activated customer account and can, for example, view or edit master data.
| Notification of a new registration request by email | |
| List of new registration requests | To access it, go to Customers -> Registration requests |
| Open a request | Open the organisation. If necessary, also click on the user associated with the organisation (tab "Users") and check which people are behind the user |
| Confirm | Set the status to "active" The user now receives an email (IDENT, see here) The user can then sign in with their |
| Reject | Set the status to "rejected" The user now receives an email (IDENT) |
TIP
User accounts that are already associated with an organisation cannot currently be used again to register another organisation account. If such a case occurs, the organisation must be created by the shop operator and the user associated with it, or another email address must be used (temporarily) for the registration process.
Emails / flows for customer registration
When a B2B customer registers online in the TradelinePro webshop, several emails are sent.
→ Automations / trigger emails
Double opt-in email
When customers register online in the shop, they enter their email address. To ensure the security and validity of shop accounts, you can ask your customers to confirm their email address after registration.
By confirming the email address at registration, you can prevent the creation of fake or unauthorised accounts. It also improves the security of the shop account, as customers retain control over the email address linked to their shop account. In some cases, laws or industry regulations require confirmation of the email address at registration to protect user data and privacy.
To prompt customers to confirm their email addresses, click in the TLP settings XXX here XXX
If the option "Confirm email at registration" is disabled, we strongly recommend using XXX captcha XXX to increase the security of your webshop, prevent spam attacks and protect it from bots.
TradelinePro basically offers 3 captcha options:
- Honeypot
- Simple captchas
- Google reCAPTCHA
Both honeypots and simple captchas deter basic spam attacks. In general, we always recommend using Google reCAPTCHA, as this offers the greatest protection against spam attacks.
TLP sends a confirmation email to the specified email addresses. To complete registration, customers must click the link in the email to confirm their email address. The confirmation link is valid for 2 hours. This ensures that users have enough time to complete the registration process without compromising security.
Until customers confirm their email, the email confirmation status of a shop account is "Not confirmed".
As soon as customers click the link in the email, a notice is displayed in the webshop confirming that the email was successfully confirmed. On the sign-in page the customer then has to enter an email address and password to sign in to the webshop.
In Admin, the email confirmation status of a shop account changes to Confirmed.
The setting is made here: ⇒ Settings → Shop → Sign-in & registration
Registration confirmation to the user
A B2B customer receives an email. The email informs them of the successful registration of a B2B customer as a business customer.
Notification of registration to the shop operator
A shop administrator receives an email. The email informs a webstore administrator about the registration of a new B2B customer. In this email, a webstore administrator can see a link to review the registration of a shop account. Clicking the link opens the B2B shop account awaiting approval in TradelinePro Admin.
The approval of registration requests is described here.
Final notification of approval to the user
A B2B customer receives a confirmation email as soon as a webstore administrator approves a shop account. In the email, a customer can see a link that takes them to the sign-in page in the TradelinePro webstore.
Additional fields at registration (B2B)
To capture further information from customers at registration, an extension of the Shopware standard custom field logic is used. An explanation of custom fields and support for maintaining them can be found in the Shopware 6 documentation.
TradelinePro provides a standard form for the registration process of your customers.
You can extend this form in shop administration with additional fields. The requested data is then made available to you in the data record of the organisation or user in administration.
To use custom fields, go to "Settings" => "System" => "Custom fields" and create a new custom field set. In the set information, set the selection box "Use for" to the value "Customers". In addition, enable the "Display custom field set on registration page" toggle. The following illustration shows this setting.
You can now create as many fields as you like that will be added to the customer record. You can define whether a field is mandatory.
TradelinePro supports the following field types:
- Selection field (displays a list of predefined options)
- Text field (entry of free text up to 255 characters)
- Media field (allows uploading any file)
- Date/time field
Only the sets enabled for it are displayed in the frontend (see XXX above).
The contents of these fields are stored in the backend on the customer record. If files were uploaded, they can also be viewed and downloaded there.
The input values from the fields can likewise be used in the emails (or templates) linked to the form.
Default customer account role of a user
As the shop administrator, you can choose the default customer account role of a B2B customer when they register in the shop.
Note: The customer account role is not to be confused with the customer group. Further information on the rights and roles concept in the customer account can be found here.
In Admin, click on: XX On the Registration tab, look at the Default account role field.
Adding further users to a company account
TradelinePro is designed so that several users can be associated with a company account.
TIP
An email address that is already associated with any customer account can no longer be used for another registration in the storefront.
Adding further users to an organisation can be done in the following ways:
A) Through the administration area, by you
- Open an organisation
- Click "Add user"
- The invited user receives an email from the system informing them of the action and at the same time providing a link to create a password
- As soon as the new user has created their password, they can sign in to the customer account
TIP
If a user is already registered, they receive a different email which only informs them about their new association with the selected organisation. You are informed about this via an adjusted confirmation message from the system XXX
B) By your customers as a self-service function in their customer account.
- To do this, a user with the "Administrator" role opens the "Employees" area in the customer account
- Clicking the "Add user" button opens a form
- In the form, first name, last name and email address are entered
- The invited user receives an email from the system informing them of the action and at the same time providing a link to create a password
- As soon as the new user has created their password, they can sign in to the customer account