Introduction
Steps from the cart to the order confirmation.
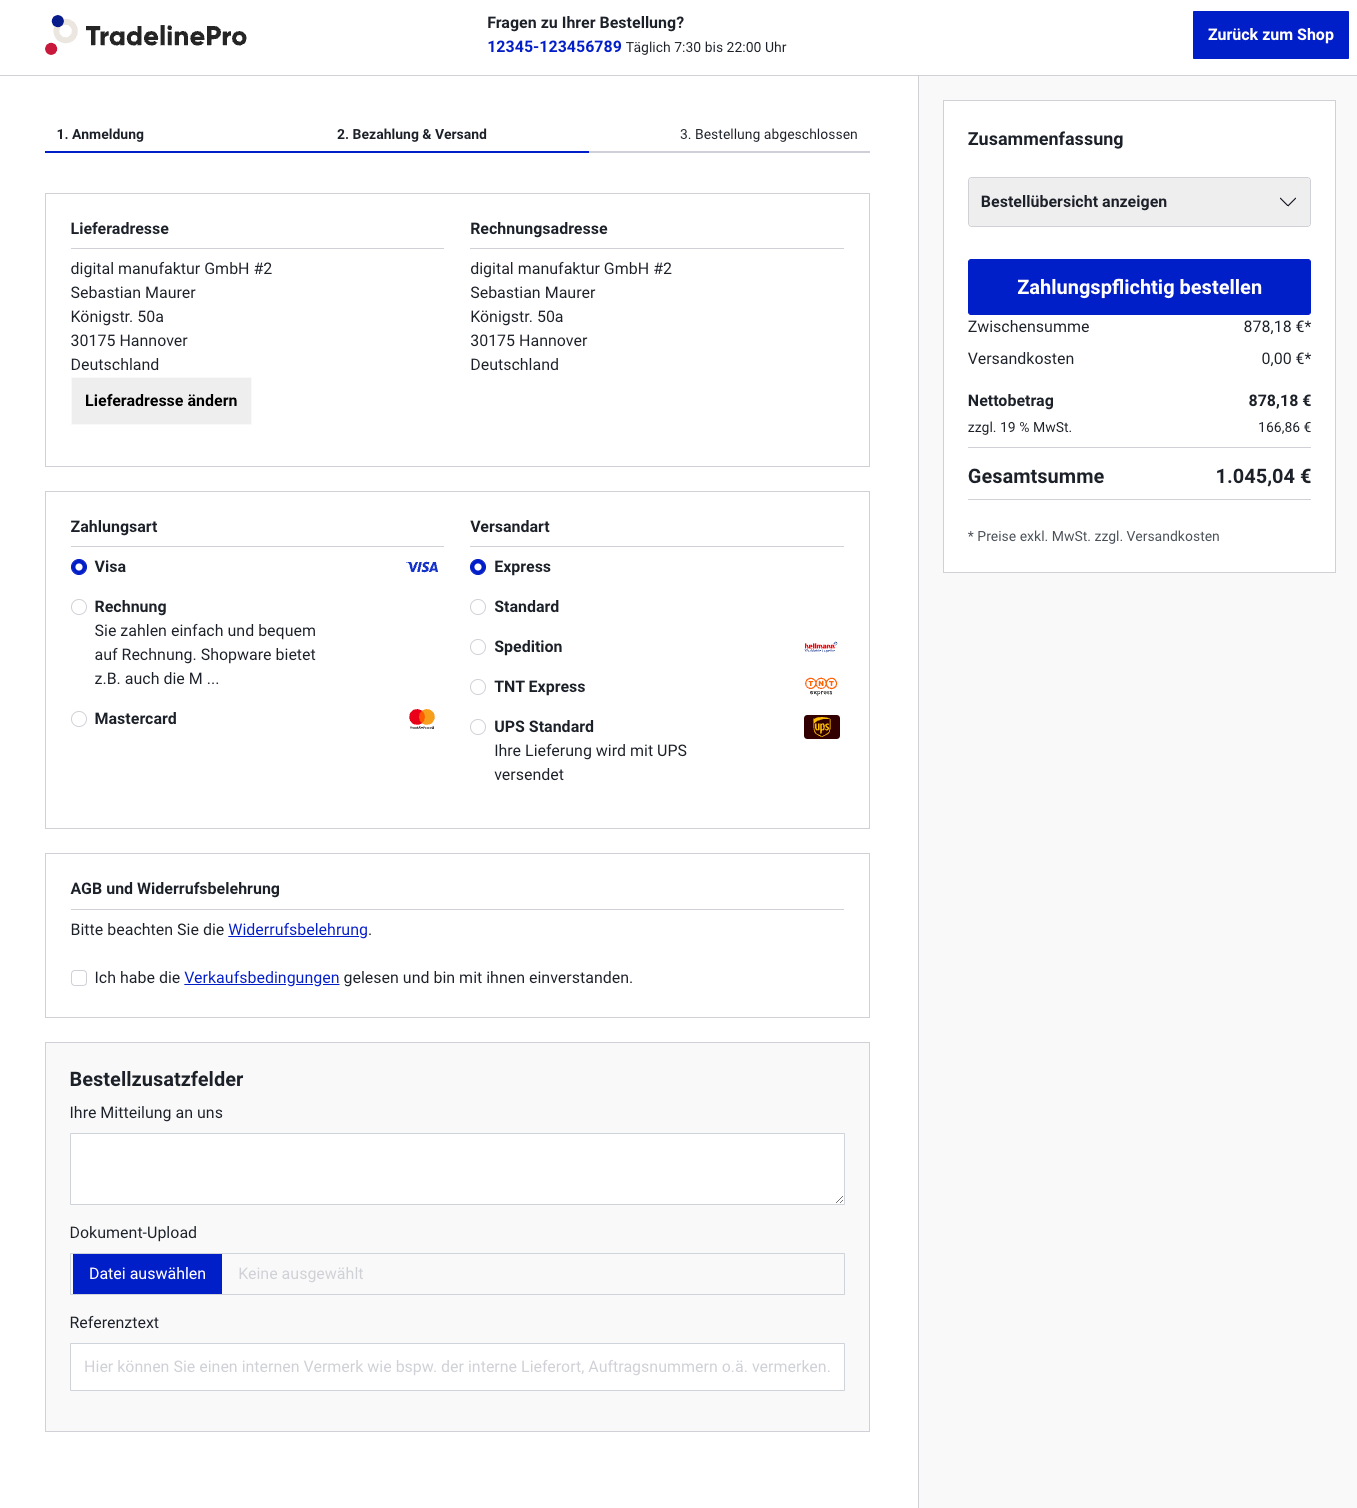
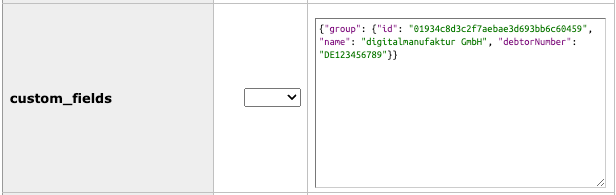
Company data in the order object
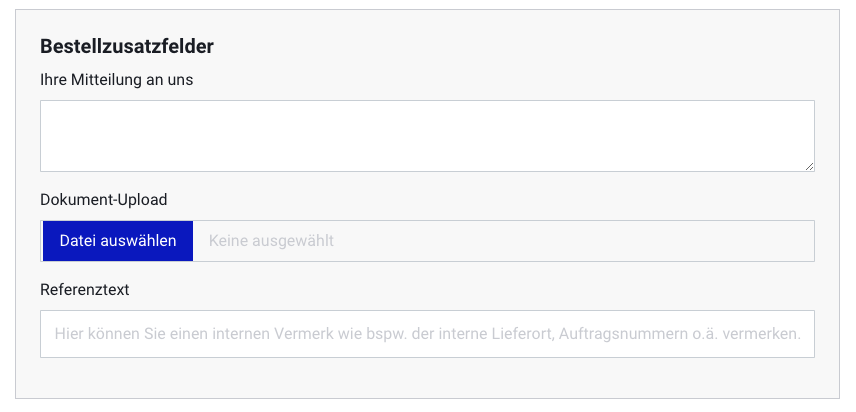
Custom fields in the checkout
To request further information from customers during the order, an extension of the Shopware standard custom field logic is used. An explanation of the custom fields and support for their maintenance is provided by the Shopware 6 documentation.
Creating custom fields
a) To use the custom fields, you must create a new custom field set under "Settings" => "System" => "Custom fields". In the set information, you must then select "Orders" under "Use for":
As soon as a set is created for "Orders", it is also automatically displayed in the checkout. Now you can create any number of fields that can be filled in by customers. As with the Shopware standard, you can decide for yourself whether a field is mandatory or not. TLP supports the field types "selection field", "text field", "media field" and "date/time field". The contents of these fields are saved at the order in the backend. Any uploads can be downloaded there. The contents of these fields can also be used in email templates, although manual integration in the respective templates is required in any case.
File storage location
View in the admin
Via API
Via email
Email templates (order confirmation) The custom fields are saved in the same way as the backend would do. Effectively, the information is located directly on the order itself. (eg.: order.customFields.NAME). If you upload a media file, the id reference is saved in the customField and you may use the twig function "searchMedia" to get the media object. It's the same with object (db) references (for example, if you let the customer select a property on checkout), only the id for the object is saved in the customField. API (order endpoint) It is the same as with the email templates, except that you have all custom fields of the order directly in the response
Configuration
The configuration of the plugin can be carried out under the following URL slug:
With the "Show order free text fields" setting, you can activate or deactivate the plugin in the storefront. If this setting is not active, the plugin's functions are not visible. You can also specify in which folder of the Shopware media database media are stored that the customer uploads as part of the checkout (such as a trade licence). The plugin automatically creates a folder during installation, so this setting usually does not need to be adjusted.